
Photographs by Daniel Mariotti
The Art and Science of Wax: A Crucial Step in Lost-Wax Casting
At Bollinger Atelier, the wax process is where the magic really starts to take shape—literally. This second major step in the lost-wax casting method is where precision meets artistry, transforming molds into detailed wax positives that will ultimately become stunning bronze sculptures. Whether you’re an industry pro or just curious about how metal sculptures come to life, this guide will walk you through our wax process, step by step.
From Mold to Wax: Breathing Life into the Material
Before we even touch wax, we meticulously document every project. This helps us track each sculpture in our queue and monitor its progress through the wax department.
The process begins when we receive the mold. First, we check that all necessary molds for the sculpture are accounted for—since many pieces require multiple molds that will later be assembled. We clean and label the molds, then apply a release agent so the wax can be easily removed. If any areas of high texture need extra attention, we “paint in” wax before sealing the mold. This ensures all those intricate details are preserved. Once the mold is prepped and securely closed with each “key” in perfect alignment, it’s ready for rolling.

Rolling the Wax: Where the Real Action Begins
If the mold has openings on both ends, we seal one side with a wax-treated cardboard cap to keep the wax inside. Next, we pour wax into buckets to cool to the perfect rolling temperature. Meanwhile, the rubber mold is gently heated—this reduces bubbles and ensures a smooth surface on the final wax.
Rolling is where things get hands-on. Our artisans prepare by laying down a thin layer of water for easy cleanup and strapping on back braces (safety first!). If the mold is heavy, we use hoists to help maneuver it. As we roll, we visualize the mold cavity, watching for areas where wax might flow unevenly. A solid wax positive requires three to four layers:
First Layer (Print Coat): This is the hottest layer, made with our red print coat wax. Before pouring, we torch the surface to remove bubbles, then pour slowly and gently for maximum detail.
Second Layer: Another red wax layer reinforces the surface, poured at a slightly cooler temperature.
Third & Fourth Layers: We switch to our reclaimed wax, pouring it progressively cooler and thicker to build up the final ¼-inch thickness.
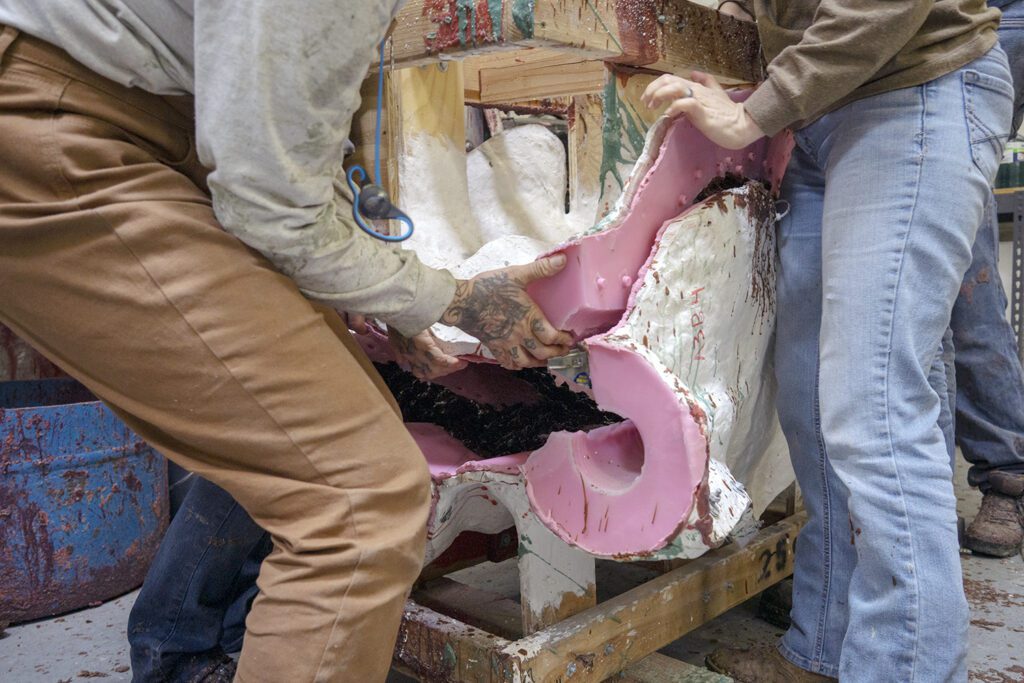
Once rolled, we measure the thickness to ensure consistency. If needed, we add wax or wooden dowel braces to prevent warping as the wax cools. When the wax reaches room temperature, we remove it from the mold and inspect the surface. If imperfections are found, we re-roll to save time on dressing. Thin spots get extra wax, thick areas are carefully scraped down, and once everything is just right, we move on to dressing.

Dressing the Wax: Making Perfection Look Effortless
Dressing is where wax gets refined. Once the waxes have cooled to room temperature, we remove them from the mold and take a close look at the surface and overall thickness. We remove seams, fill surface imperfections, and restore textures altered during molding. Our artisans use specialized tools and heating techniques to match the original texture with precision. Once the surface is perfected, we apply a buffing agent to erase tool marks. A well-dressed wax should look like it was never touched by human hands—just a flawless replica of the original artwork

If the sculpture has multiple wax parts, we fit them together to ensure a seamless assembly. Once satisfied, we submerge the wax in an etching solution to remove any remaining buffing agent or oils, preparing it for the next step.
When the wax is as close to looking like the artist’s original as possible, photographs are taken for the artist’s approval. The artist will give any corrections or direction on small changes as needed. Once these are applied to the wax, we finish dressing by applying “disclosing wax,” which fills any tiny pinhole bubbles remaining on the surface.

Gating: The Wax’s Circulatory System
Think of gating as the wax sculpture’s circulatory system—it controls how molten metal flows in and how air and gases escape during casting. Every piece gets a custom-designed gating system tailored for optimal metal circulation and minimal casting flaws. The system includes:
- Cup: The entry point for molten metal.
- Down Sprue: A channel directing metal flow.
- Gates: Pathways guiding metal through the sculpture.
- Vents: Escape routes for trapped air and gases.
At Bollinger Atelier, we typically use an indirect gating system, fine-tuned for each sculpture. Once gating is complete, we weigh the wax and record the exact metal volume needed for casting. Our gating systems are designed to ensure the best possible metal circulation for pouring, while also minimizing the work needed to camoflage these points later on.

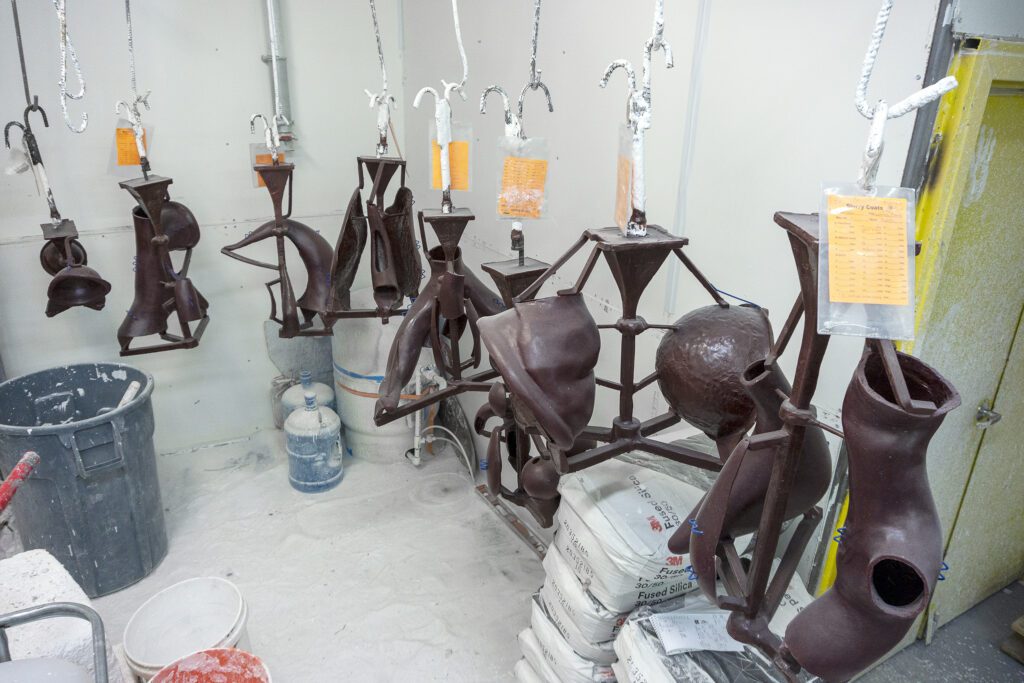
Ceramic Shell
With the wax process complete, the gated wax sculpture is ready for the next exciting stage: ceramic shell. This is where the wax gets coated in layers of ceramic material, creating the structure for the final metal casting.
At Bollinger Atelier, we pride ourselves on our meticulous wax process, ensuring that each sculpture—whether a monumental commission or a delicate bronze casting—meets the highest standards. By blending expertise with innovation, we bring artists’ visions to life with precision, craftsmanship, and a touch of alchemy.
Want to see this process in action? Follow us on social media for behind-the-scenes looks at our latest projects!